
How to build a goat milking stand

Sunshower Farms has put a deposit on two goats! One of our neighbors had a friend downsizing his herd, and he had a nanny goat and some kids to sell. We went to meet her last week and loved her! She is two and a half and a Saanen - which is a Swiss breed known for being calm and great milkers.Although we put a deposit on her and one of the doelings (a female baby goat) we can't bring them home until we have their pen built, a nice goat house built (basically a larger dog house) and a milking stand.
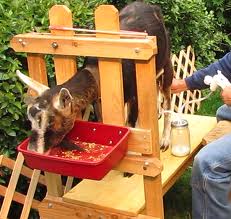
A milking stand is the place a goat stands on while being milked. They come in all varieties but the most important part is that there is a contraption to hold the goat's head in place so she cannot leave the stand. Most goat owners put a nice bucket or bag of grain on the stand for the goat to eat while she is being milked.


To build our stand, we followed plans from this site. If you decide to also use their plans, I would suggest donating to their site because the plans are so good!
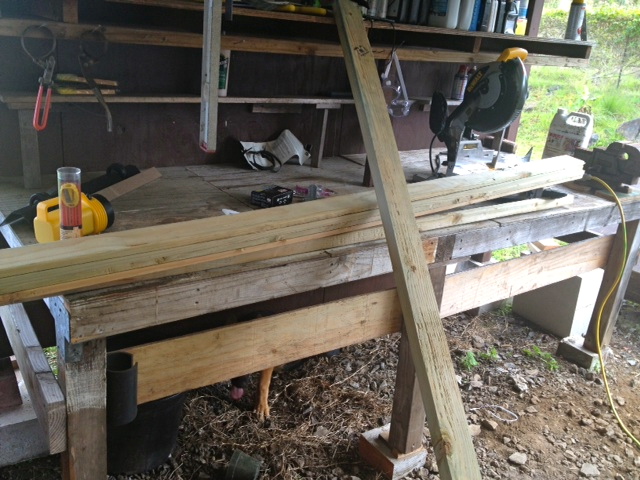
First, we bought our wood, screws, latch, brackets and bolts. This is our wood (one sheet of plywood not pictured) which cost about $40. The hardware was about $10 which brought the whole project in around $50 - much cheaper than buying a pre-made milking stand (which you can't even buy anywhere on our island anyway).
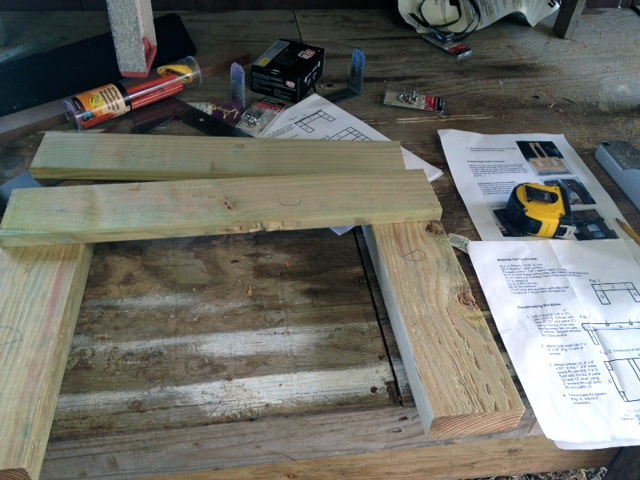
My first step was to make all of the cuts and label all of the boards. The plans we used had a letter assigned to each piece so after I cut each piece I wrote the letter on the board. Then when I later got to the assembly steps, it was much easier to know what went where.

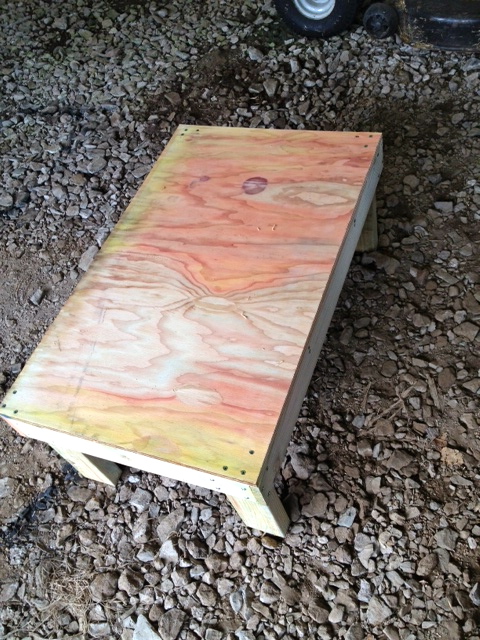
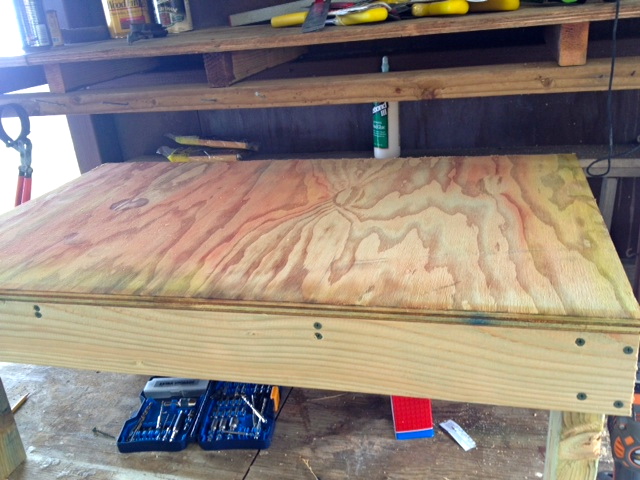
Here are my boards, all cut and labeled. For the platform of the stand, the plans say to use one 1"x 8" x 10' cut into three 36" pieces. We use a 36" x 21.75" piece of plywood instead which was much easier although possibly a little more expensive. We used a circular saw to cut the plywood and a miter saw to cut the boards - although you could use a circular saw for everything if that was all you had. We would have liked to use a table saw for the plywood but we don't have one.
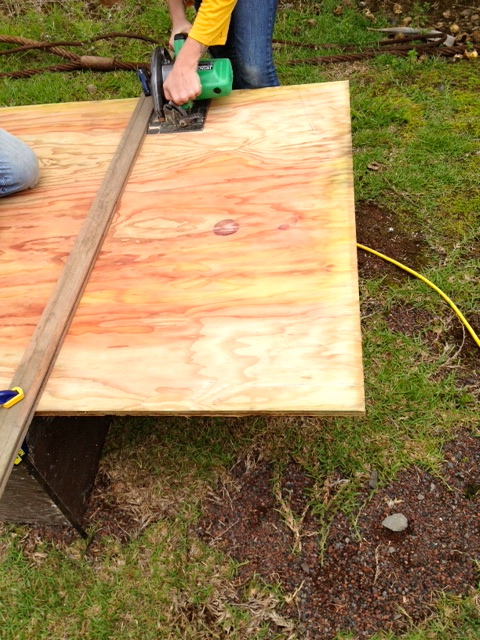
. When cutting the plywood with the circular saw, we clamped down a long board to the plywood to guide the cuts. It would be really hard to just freehand those cuts - even if you're a badass with the circular saw like Ashley.
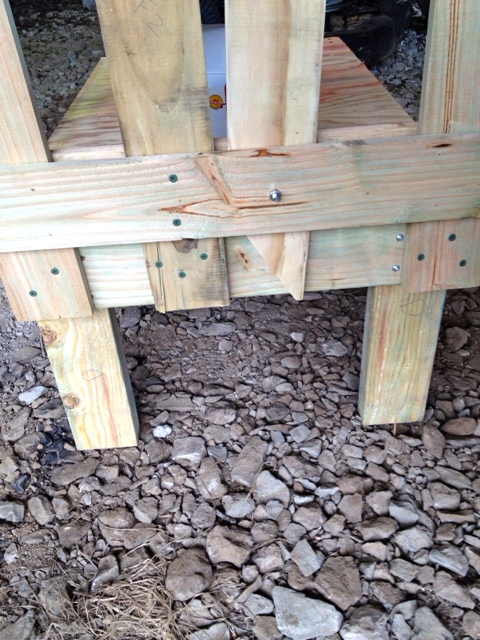
Once I had all of the pieces cut, I started to assemble my stand. If you are following along with the plans I will say the letter assigned to each piece with the steps. So, my first step was to attach the leg pieces (D) to the side braces (C) making sure to check carefully for square (you don't want a wobbly stand!). I used 1.5" deck screws and did four screws on each side.
Once those were attached, I added side braces (B) making the rectangular base of the stand. Again, I used 1.5" screws and did four on each post.
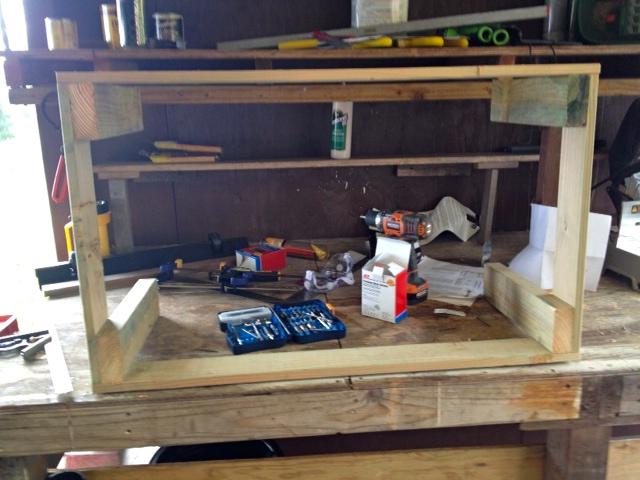
The next step is attaching the middle braces (J) to the center of the base. I used 2" deck screws for this step and did two screws on each end. For this step, it is very very important that your J braces are cut precisely. If they are too short, they wont reach to the (B) braces. If they are too long, you'll have to recut. Thankfully, mine were just right!

Once the (J) braces were in, I laid the plywood platform over the base and screwed it in at the corners. I did three 2" deck screws on each corner. Be sure to check for square very carefully at this step!
Once the base was done, I started assembling the head gate. The first step is to cut one end of one of your (E) posts on an angle to allow the head hole to open.

Then, I sandwiched the (E) posts between the (G) boards and screwed them together using 2" deck screws.


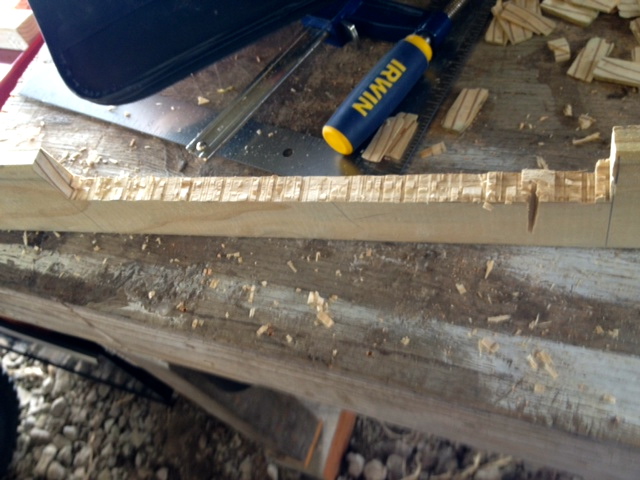
The next, and definitely most difficult step, is cutting the head hole in the (F) pieces. For people who own a jigsaw, I am sure this step is simple. But I (very carefully!) used the miter saw which was much trickier. First, I measured out and marked a 1.5" x 13.5" notch on each board. Then I sawed small cuts 1.5" down on the boards.

Once the notches were cut (which takes forever by the way), I knocked the pieces out with a hammer and planed and sanded the area. You don't want any splinters in your goat's neck!

Once the (F) pieces were sanded and ready to go, I cut a diagonal piece out of the bottom of F1 to allow it to swing out as the head gate. Then I slid both (F) pieces into the G/E head gate I assembled in the last step. I then screwed in F2 to the (G) brackets because it does not move in the gate.

I then slid the F1 piece into the head gate, lined it up a 1/2 inch from F2 and drilled a bolt hole into the bottom (G) bracket. I then screwed in the bolt that allows the F1 to swing back and forth.

Now the head gate was done! All that was left was to attach it to the platform. First, I screwed both the E and the F2 pieces into the platform making sure not to attach the F1 piece so that it is free to swing open.
Then, to add extra support, I attached two brackets on the platform to the (E) boards.


The last step was screwing in the latch!

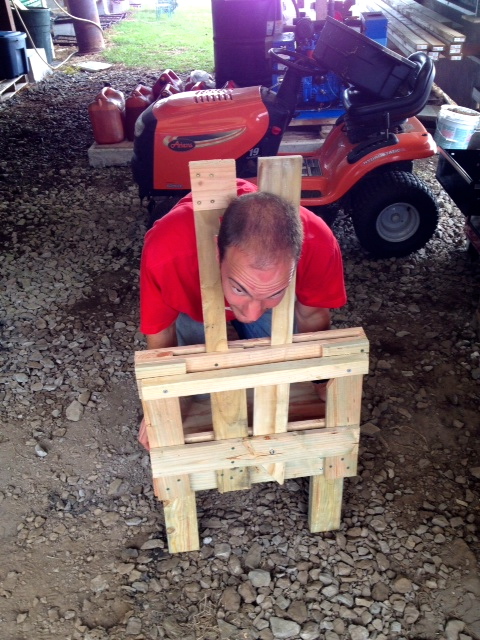
Now we can milk our goats! But first, we had to try it out on Mike...
I hope these steps are helpful to anyone trying to build a milking stand! Happy milking :)